TABLE OF CONTENTS
- Photograph and Tag-Scan Registered Asset
- Get Access to the Warehouse Module
- Accessing Warehouse Assets
- Adding a New Asset
- Editing an Asset
- Adding a Main Photo
- Asset Evaluation Checklist
Photograph and Tag-Scan Registered Asset
The Asset Management Business Solution is a powerful tool that enables a company to track the location, condition, value, etc. of each of its assets.
Before this tool can be used, however, an asset library must be constructed. This requires gathering and entering a lot of data into the Asset Management Desktop Client. It also requires taking photos of assets to show their condition and details.
The Asset Management Mobile Application (App) Module, Warehouse Menu allows users to add new assets, view existing assets, and update photos for assets.
My Assets tells a user exactly which assets are assigned to them and offers a simple way to update the assignment and the asset’s condition.
These simple instructions guide you through using the Asset Management Mobile Application Modules with a focus on registering/photographing assets to build an asset library.
Get Access to the Warehouse Module
To get access to the Warehouse module in the mobile app, the HR Manager must assign the correct role in the Employee card.
| Role | Permission |
| Mobile. Warehouse Manager | Full access: register new assets, edit them, take photos |
| Mobile. Warehouse User | View-only rights |
Accessing Warehouse Assets
Access the Warehouse menu to add assets, take photos, or scan barcodes.
- Open the mobile app and go to the
 Warehouse module.
 - Select the warehouse containing the assets you want to review.
- Tap Assets from the menu to view the list of assets linked to that warehouse.


Navigating the Assets list
Use the Search Bar
- Filter by name, asset number, or serial number.
Use the Scanning Feature (Fastest Option)
- Tap the Scan ⛶ icon.
- Point your device's camera at the asset's barcode.
- The scanned data automatically fills the filter fields.
- Results narrow down instantly.
View Asset Details
- Tap any asset in the list.
- See complete information: main asset photo, evaluation photos, and related documents.

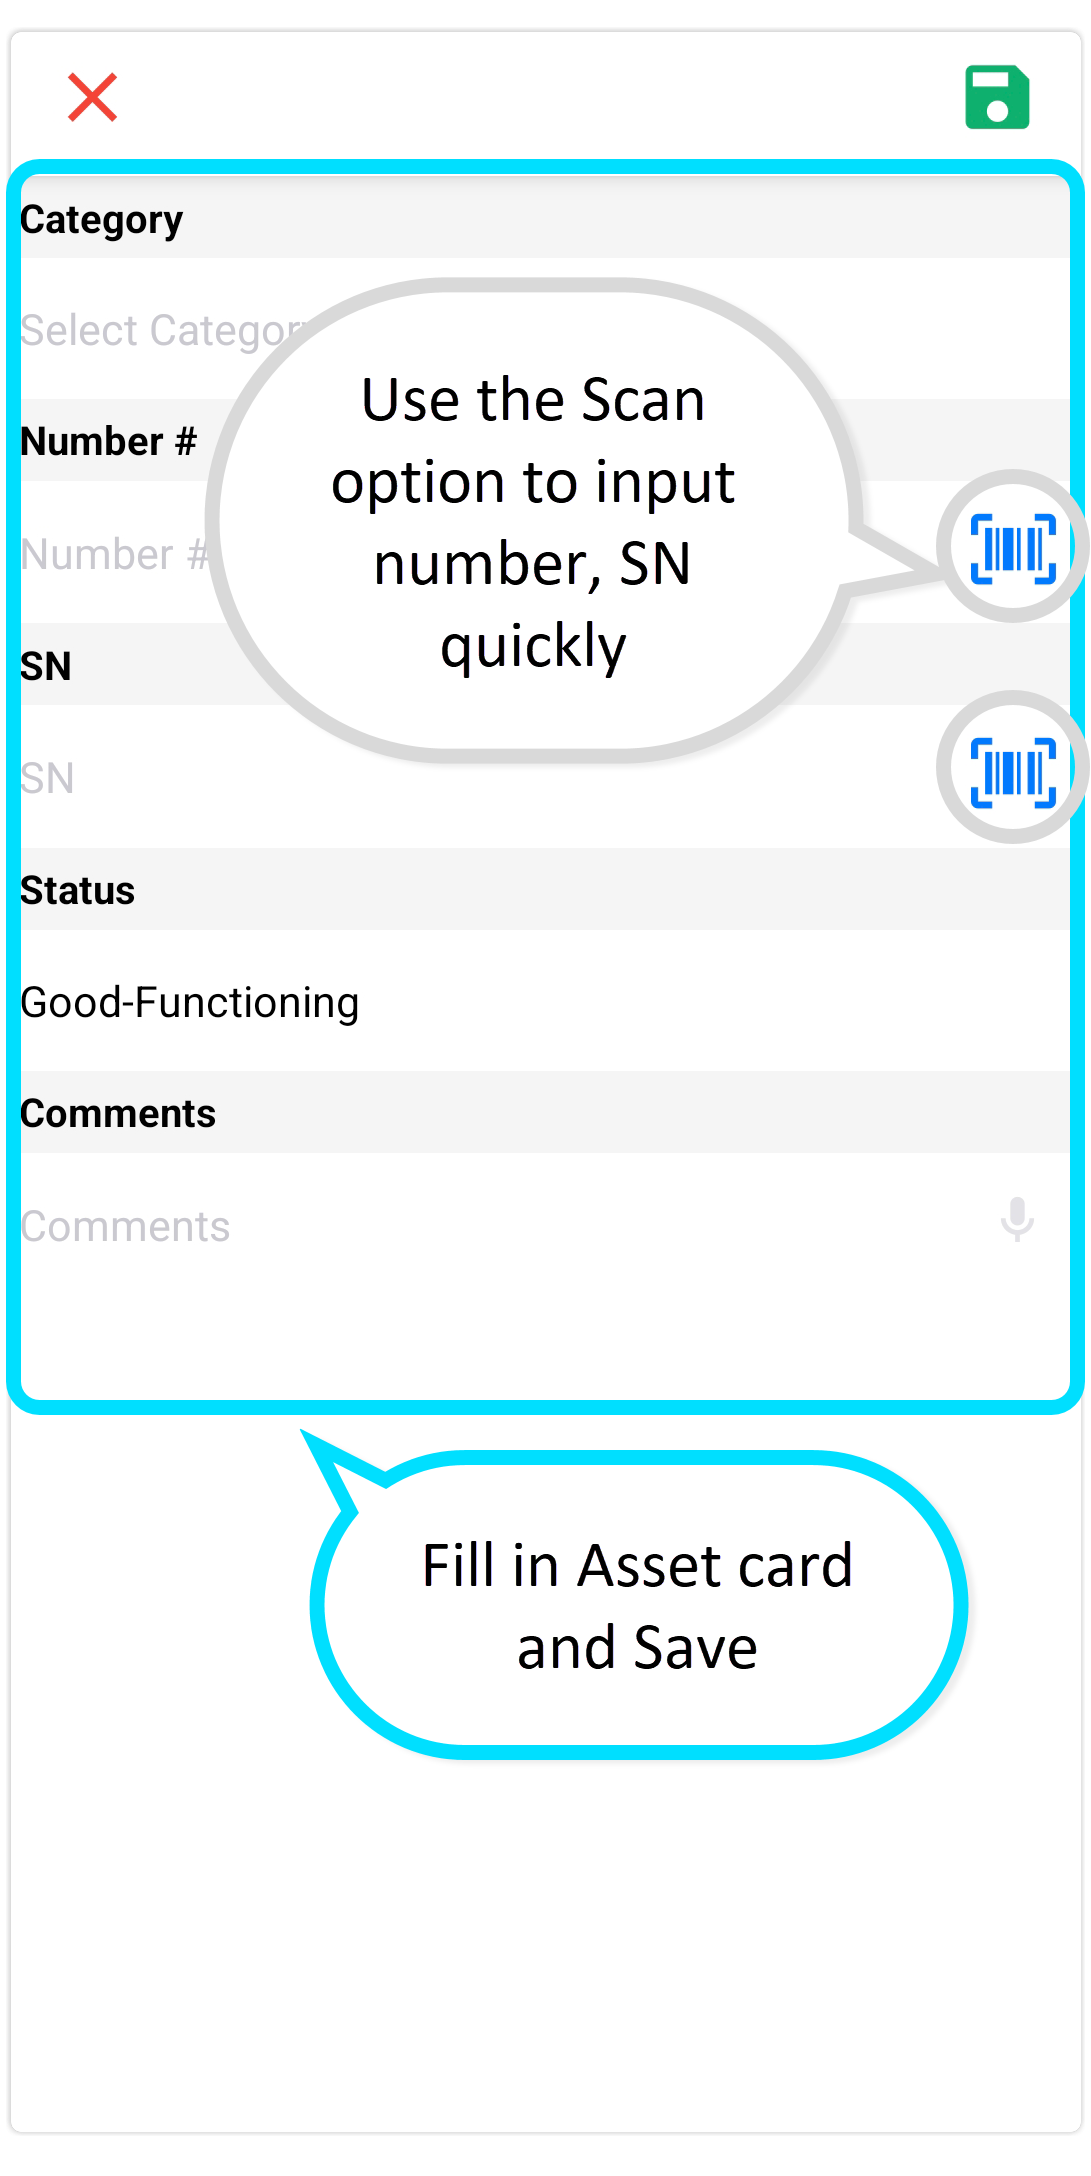
Adding a New Asset
- Tap the + icon in the top-right corner to open the New Asset form.
- Fill out these details:
- Category: Select the asset category. Use the search filter to find it quickly.
- Number: Enter the asset barcode. Tap Scan for fast entry.
- SN (Serial Number): Enter the unique serial number. Tap Scan for fast entry.
- Status: Pre-filled as Good-Functioning. Change if needed (e.g., broken, lost).
- Comments (optional): Add any extra details about the asset.
- Once complete, tap the Save icon at the top-right to save the new Asset.
The Asset Name is generated automatically based on the established naming convention for the Asset Category.

Editing an Asset
To update an existing asset:
- Tap the asset you want to update to open its details.
- Tap the Pencil icon in the top-right corner.
- Update any of these fields:
- Category: Select a different category.
- Asset Number: Update the Barcode (Tap Scan for quick entry).
- Serial Number: Update the serial number (Tap Scan for quick entry).
- Status: Change to reflect condition (e.g. broken).
- Tap the Save icon to apply your updates.


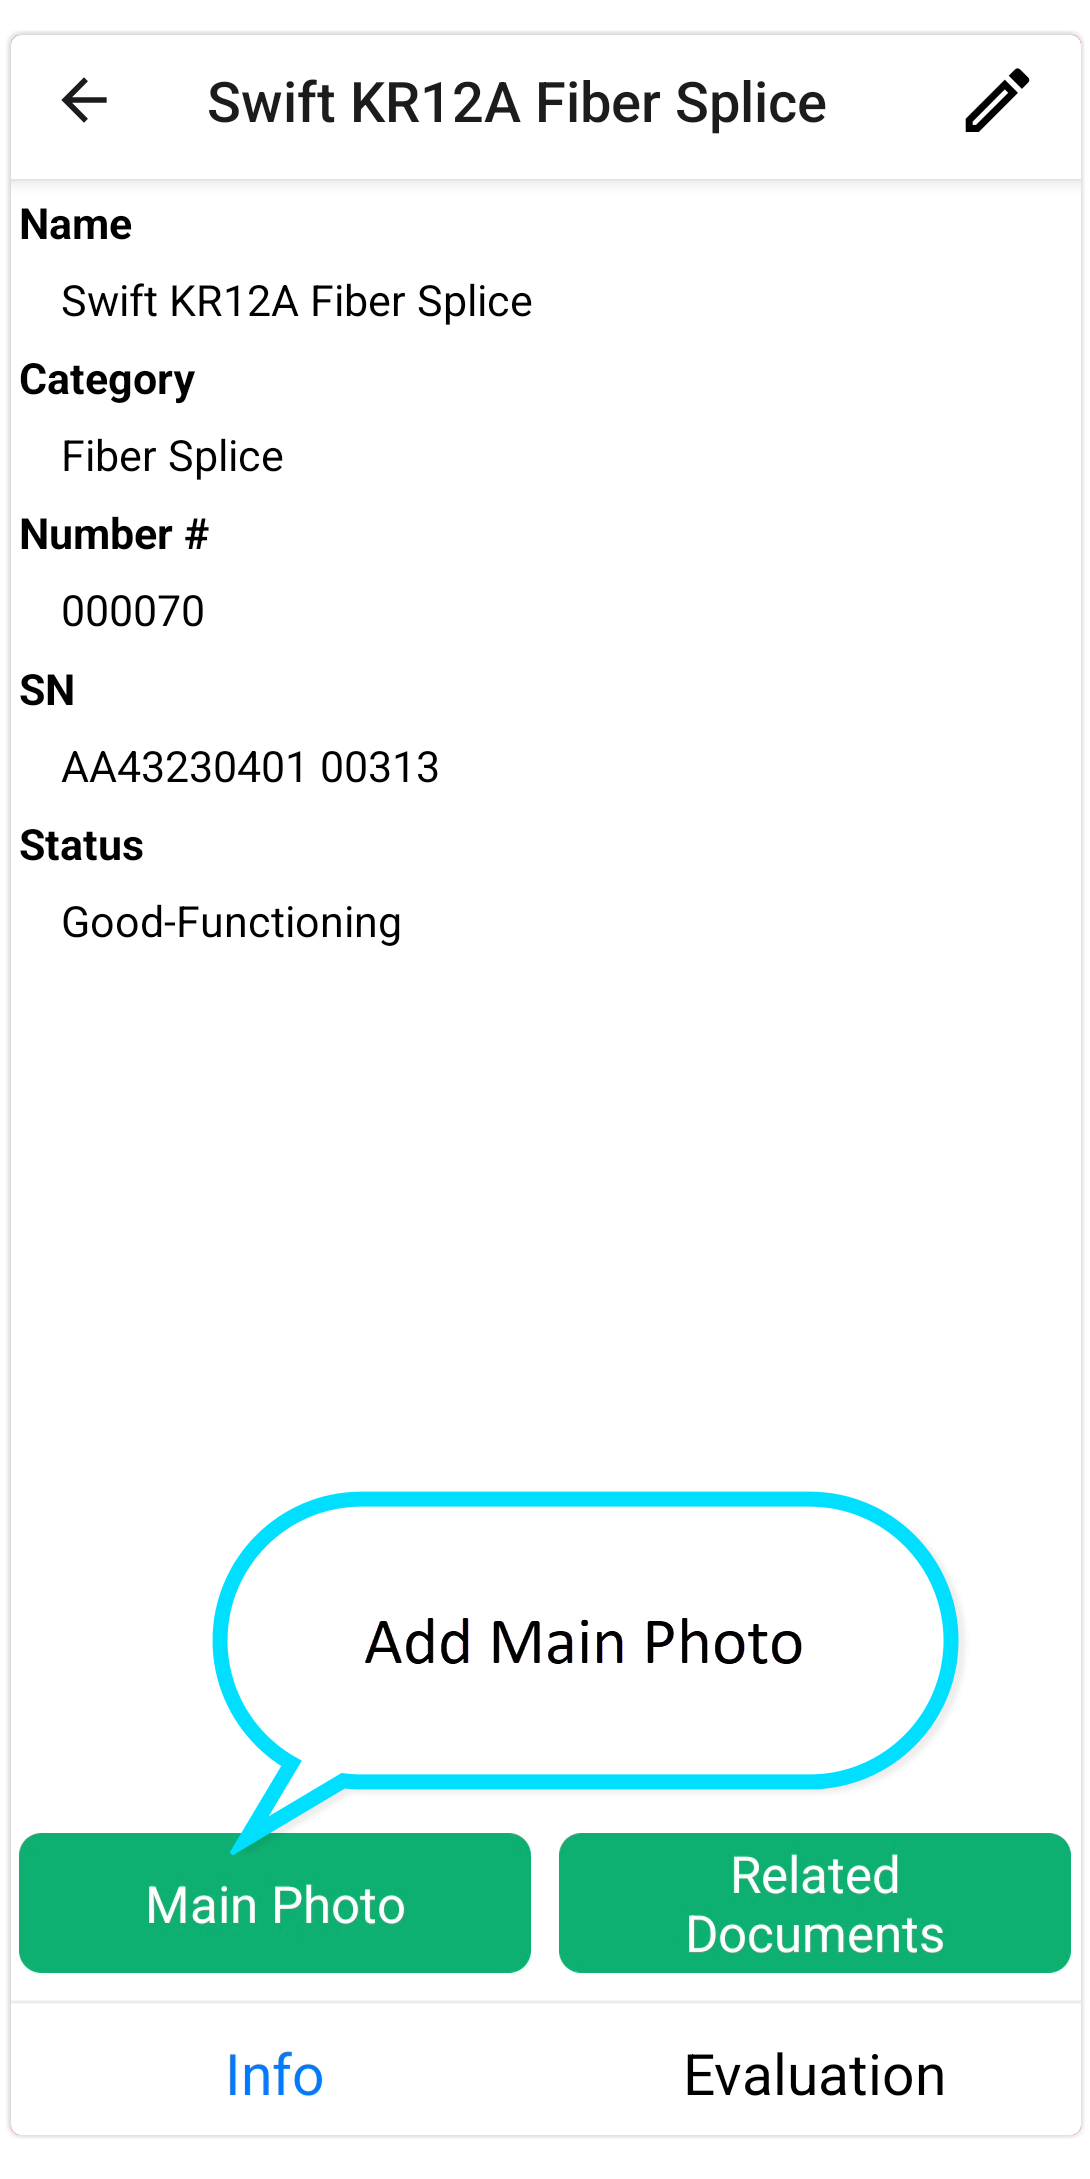
Adding a Main Photo
How to Add
- On the asset card, tap the Main Photo button.
- The camera screen opens.
- Take a photo or upload from gallery.
- Tap Save.


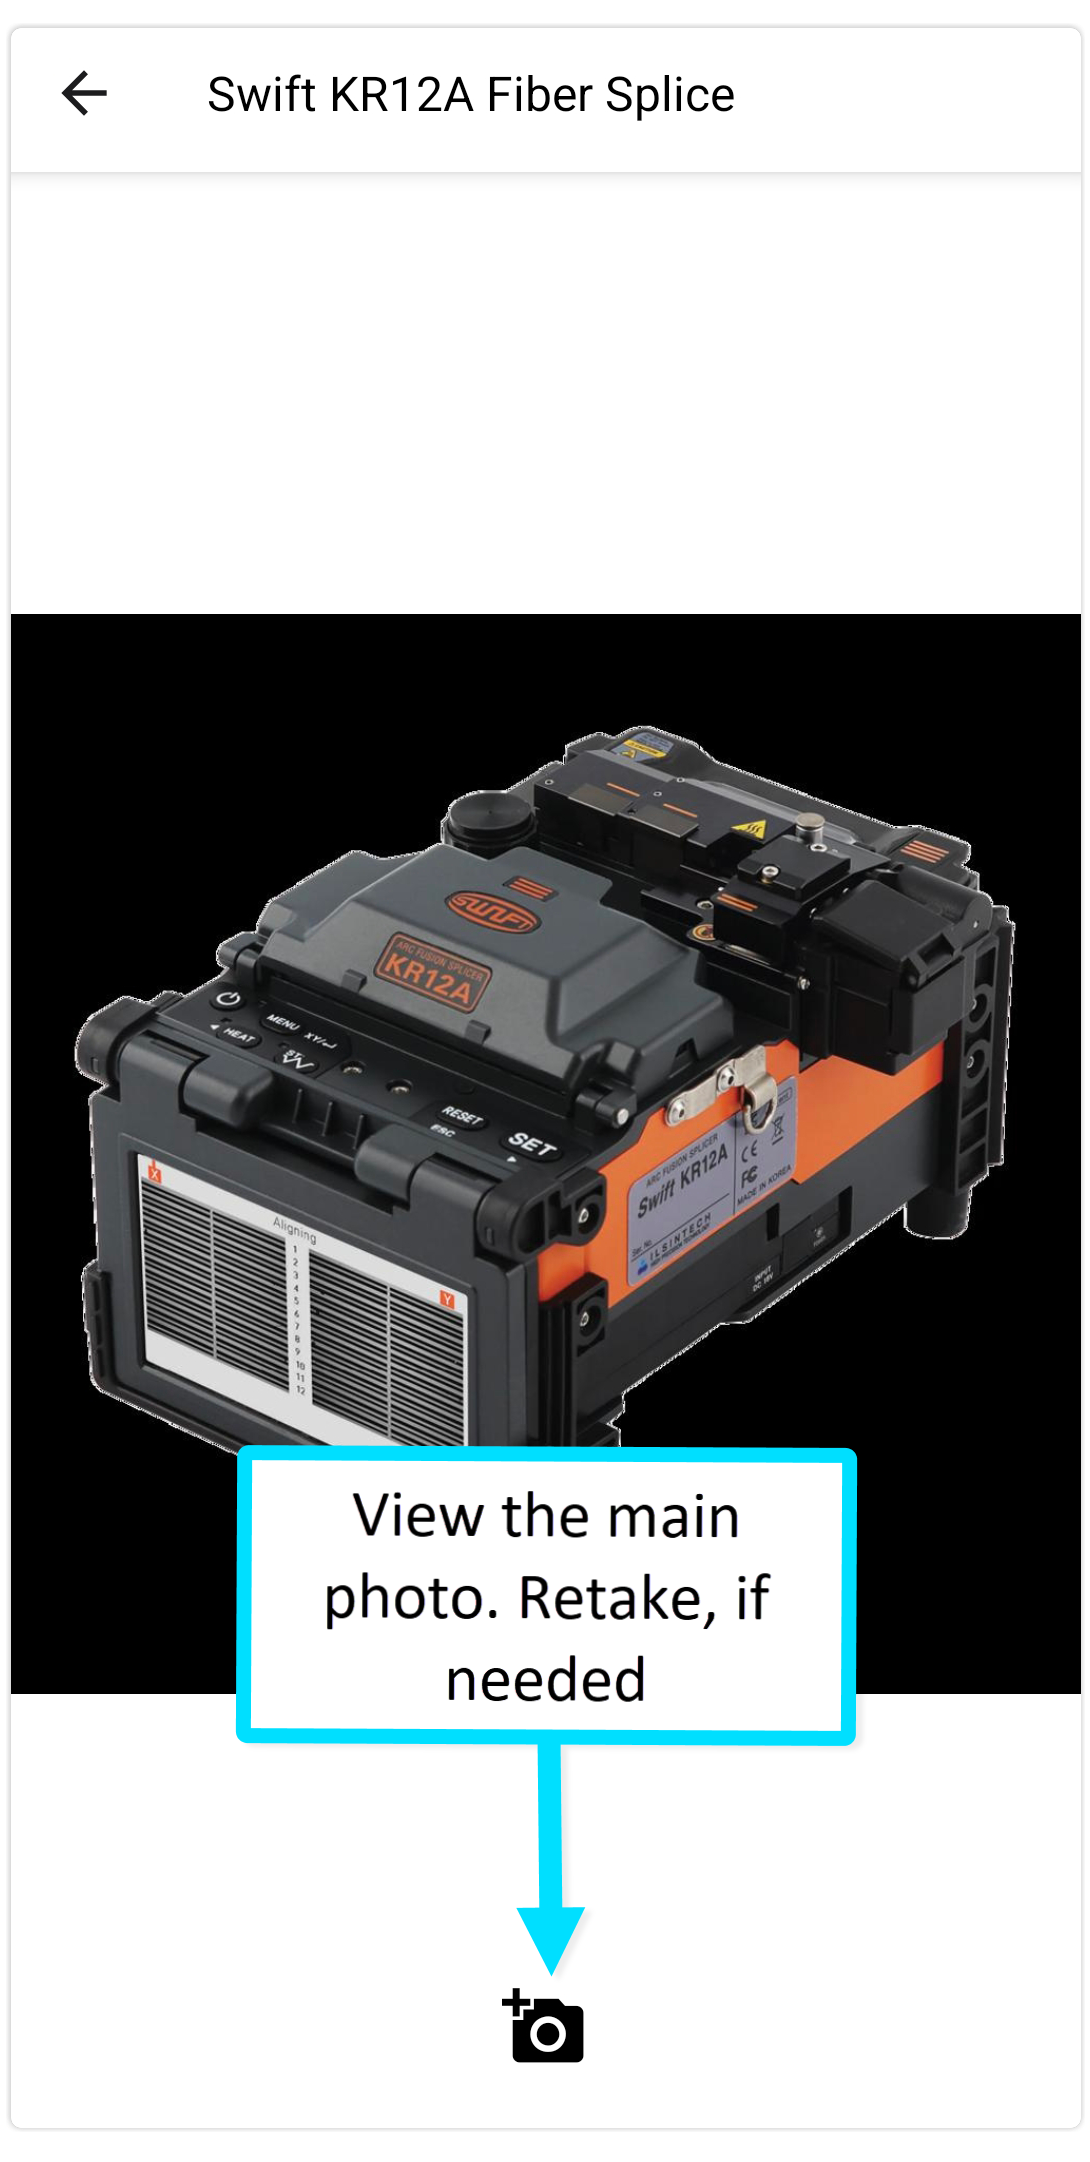
How to Update
- Tap the Main Photo again.
- Tap the Retake button.
- Take a new photo.
- Tap Save.
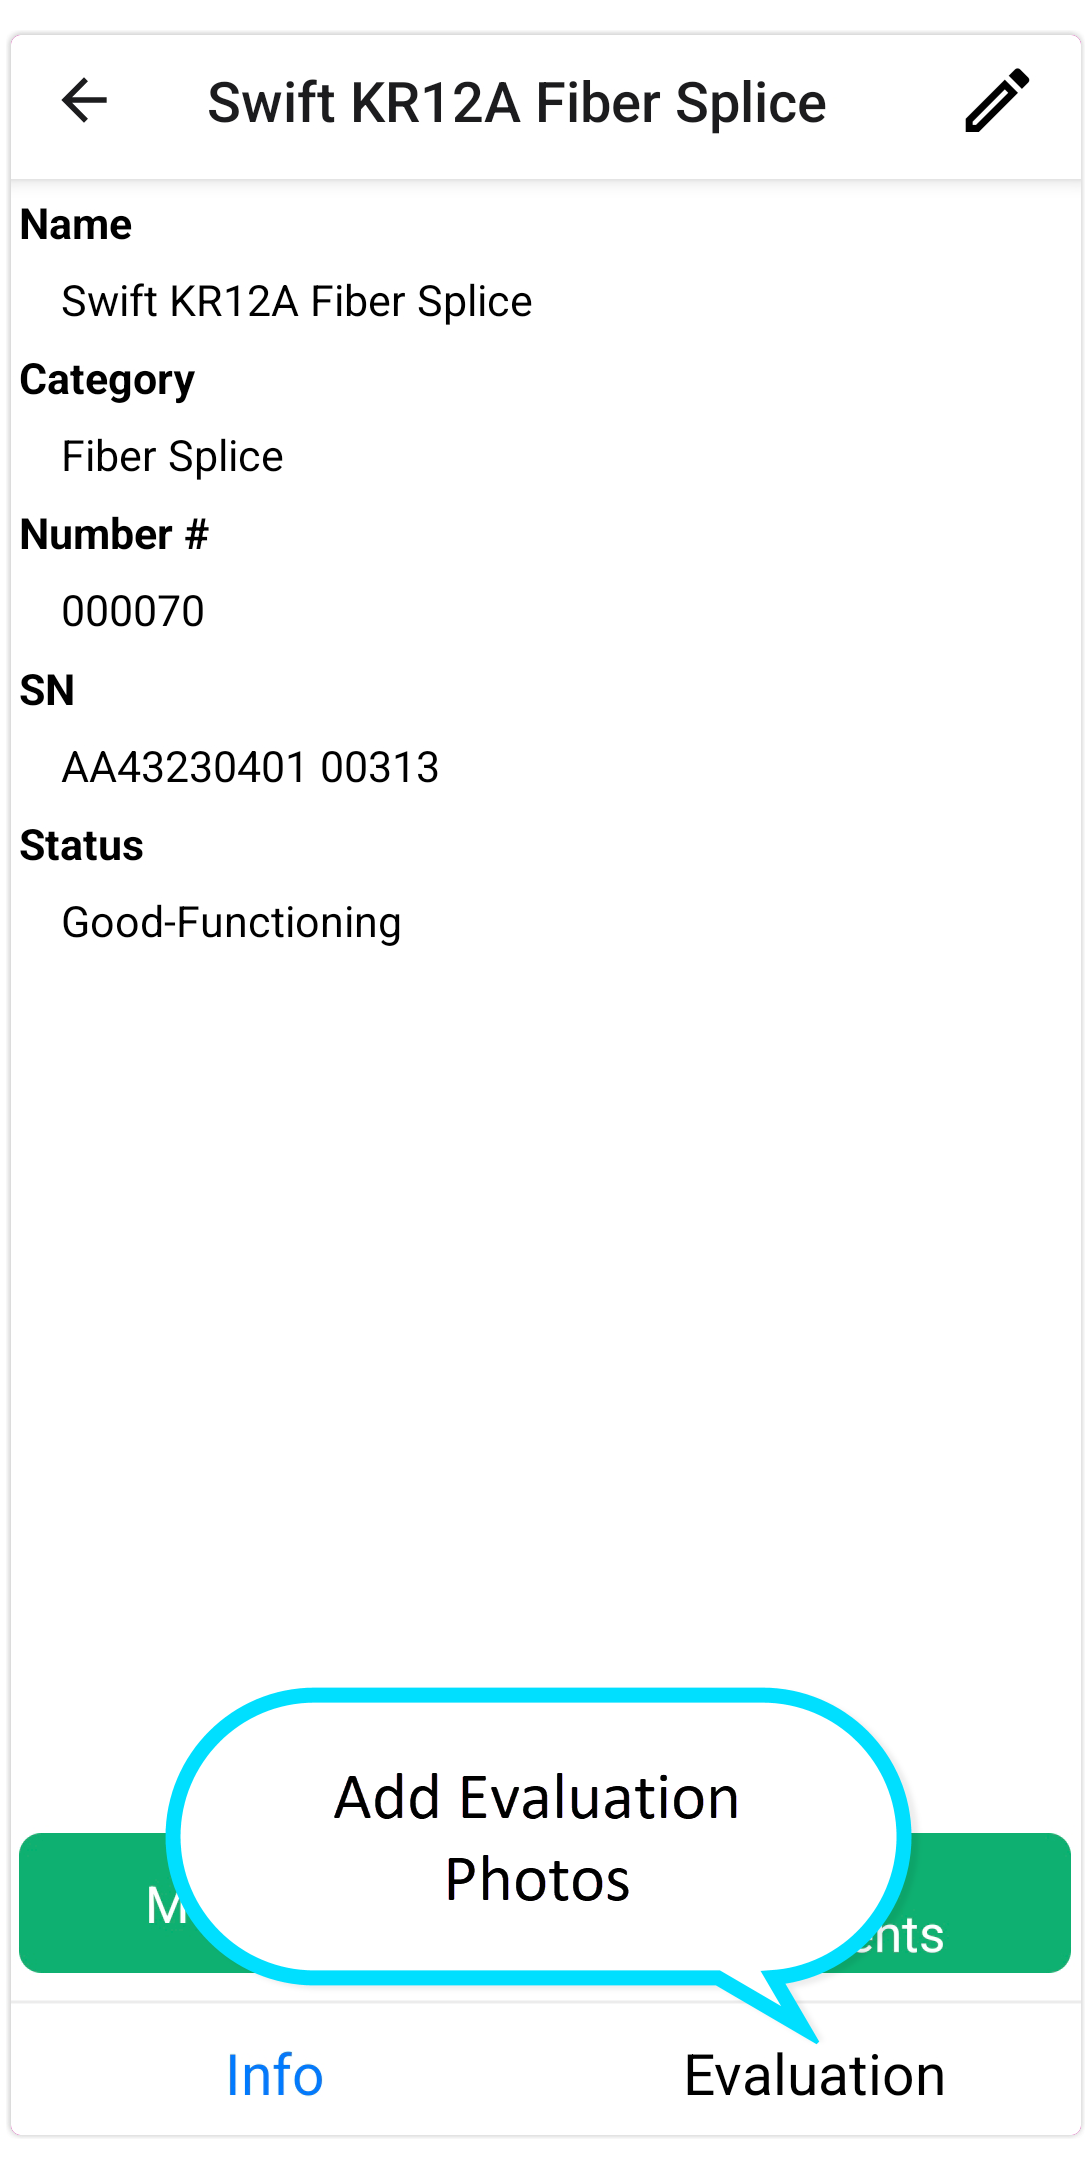
Asset Evaluation Checklist
The Asset Evaluation Checklist shows all required photos for this asset type. Each item has a title describing what to photograph.
How to Take a Photo
- Tap a Checklist Item Title.
- The Take Photo interface opens.
- Camera Controls:
- Center subject — Frame it in the live view
- Flash — Tap button: Auto → On → Off
- Focus — Tap anywhere in the view
- Zoom — Pinch in/out
- Take photo — Tap Shutter button
- Camera Controls:
- Review screen appears.
- Tap Save (green check) to upload, or Reshoot to try again.


After Taking Photo
- The checklist item shows the upload date.
- Take all required photos to complete asset registration.
- Photos upload immediately.

View Photos Later
Access them via Related Documents:
- Asset card (mobile app)
- Asset card (Desktop Client)
If you have access to the asset, you can view its documents.


Was this article helpful?
That’s Great!
Thank you for your feedback
Sorry! We couldn't be helpful
Thank you for your feedback
Feedback sent
We appreciate your effort and will try to fix the article