TABLE OF CONTENTS
- Sync Vendors from QB
- Customers and Vendors are separate
- Access rights — Vendors
- Vendors dashboard (web)
- On the Vendor card (web)
- Desktop option
Sync Vendors from QB
We sync the QuickBooks Vendor database with Vendors in Fieldclix. The following table shows how the fields are mapped across:
From QB | To FCX |
Vendor Name | Name |
— | Category =Vendor |
Vendor Type | Org.Category |
Billed from | Billing Address |
Shipped from | Shipping Address |
Payment Terms | Payment Terms |
Account No | Account Number |
Vendor Is Inactive | Status |
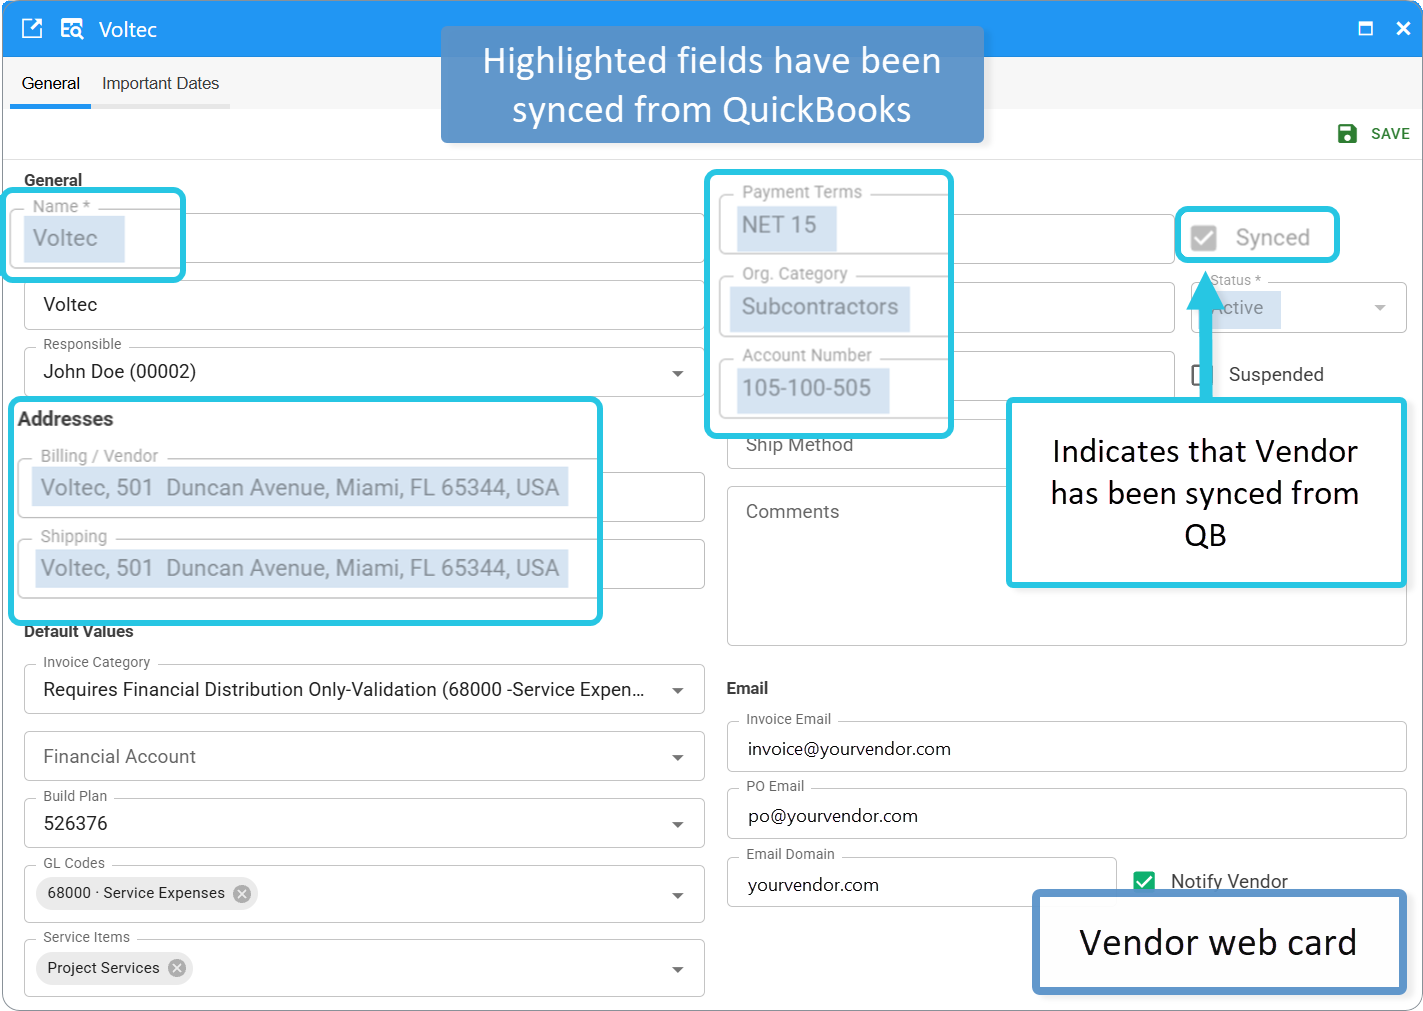
Vendor's fields synced from QB are not available for editing.Vendors reference supports two-way sync. You can create a Vendor and sync it to QB. In this case, Vendor card fields are matched as follows:
| From FCX | To QB |
| Name | Vendor Name |
| Status | Vendor Is Inactive |
| Billing Address | Billed from |
Shipping Address | Shipped from |
Payment Terms | Payment Terms |
Account Number | Account No |
After the Vendors have been synced with the FCX, we need to fulfill the Vendor Card.
Customers and Vendors are separate
Fieldclix keeps Customers and Vendors in two separate lists.
| List | What it is for |
|---|---|
| Customers | Companies you bill — Build Plans, Sales Orders, CIM invoices |
| Vendors | Companies you buy from — VIM invoices, vendor POs, materials, COD, inventory |
You no longer open one Organizations list and switch between Customer and Vendor views.
Access rights — Vendors
Two different ideas: view a card in context vs manage the Vendors library.
| What | Who can do it | Notes |
|---|---|---|
| Any user with access to that related record | Examples: Build Plan, Sales Order, Material, VIM Invoice, Vendor PO, Location, Asset, COD, inventory documents — wherever a Vendor link appears |
| Only library editors: Accountant and Bookkeeper, or Project Library Manager |
Vendors dashboard (web)
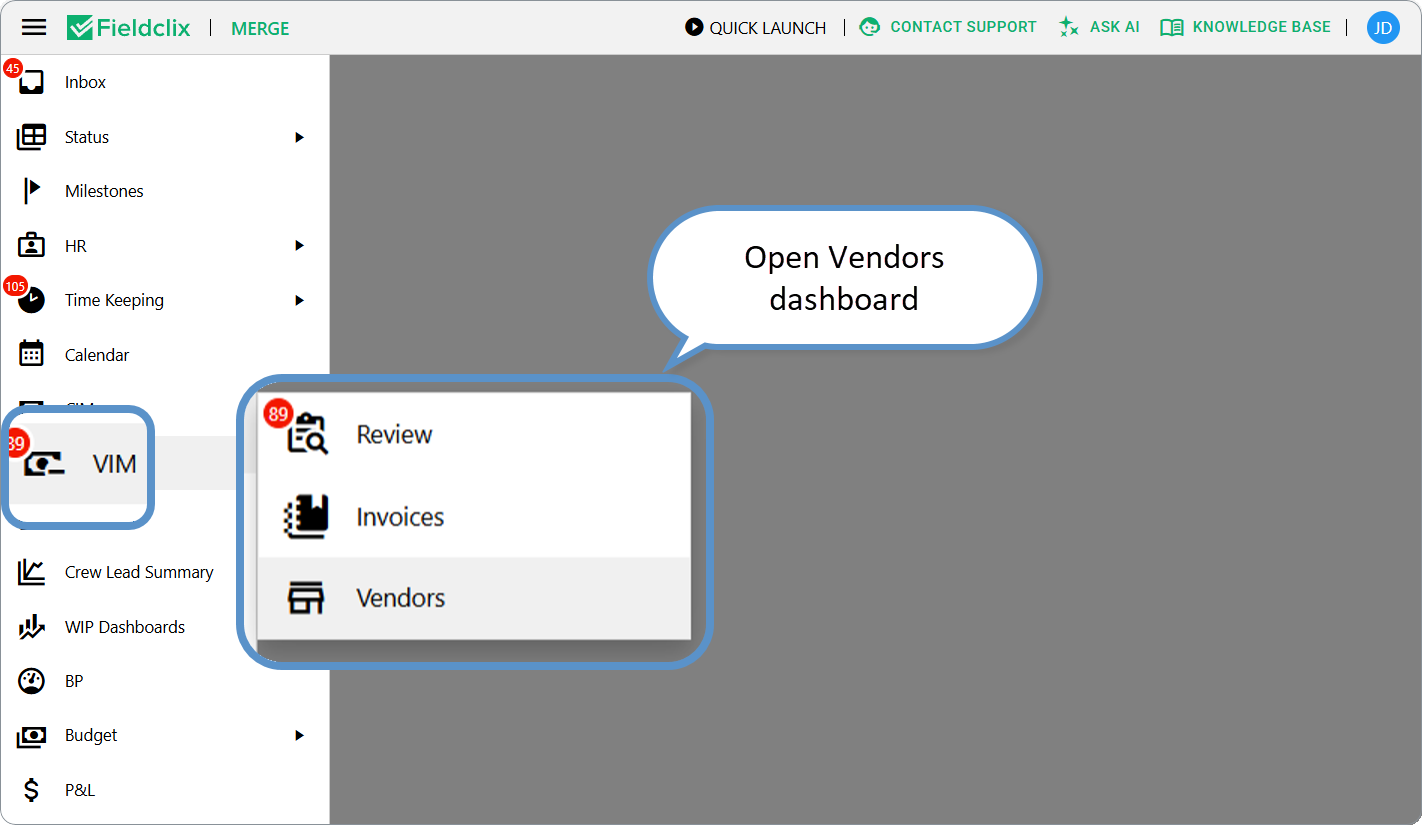
Use the web portal when you want to browse vendors, open a card, or create a new vendor.
Where to find it
- Sign in to the Fieldclix web portal.
- Open the side menu → VIM.
- Click Vendors.
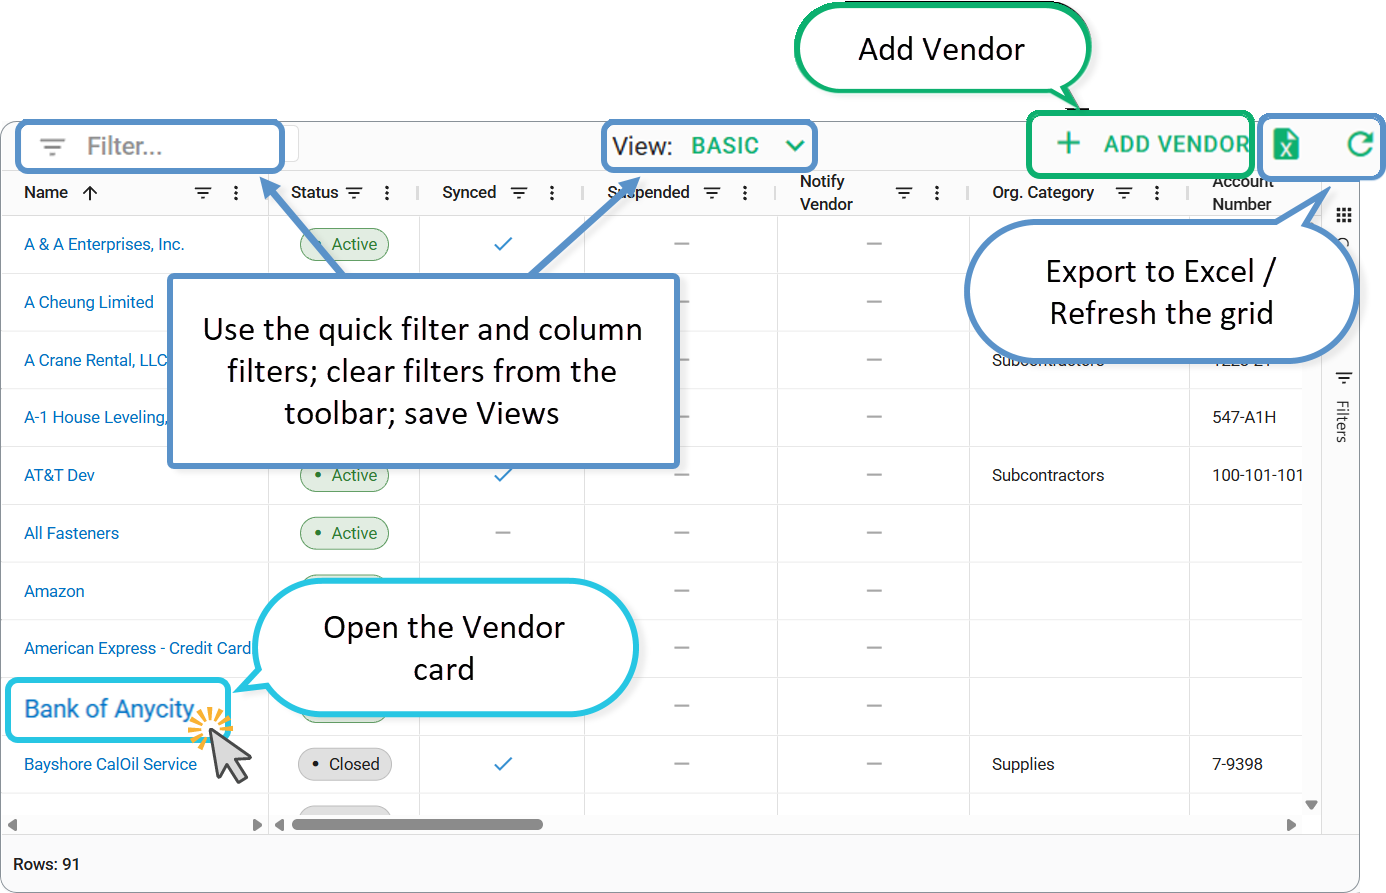
You see a grid of all vendors (Name, Status, Synced, Suspended, category, account number, responsible, payment terms, and related defaults).
What you can do on the dashboard
| Action | How |
|---|---|
| Browse / search | Use the quick filter and column filters; clear filters from the toolbar; save Views if your company uses them |
| Open a Vendor card | Click the vendor row (or the name link). The card opens on the web. Use previous / next on the card to move through the filtered list without returning to the grid |
| Create a Vendor | Click ADD VENDOR on the toolbar. Fill the card and save |
| Export | Use Export on the toolbar when you need a file of the current grid |
| Refresh | Use Reload after sync or after a teammate’s changes |
On the Vendor card (web)
- Open Vendor card and fill in all required fields.
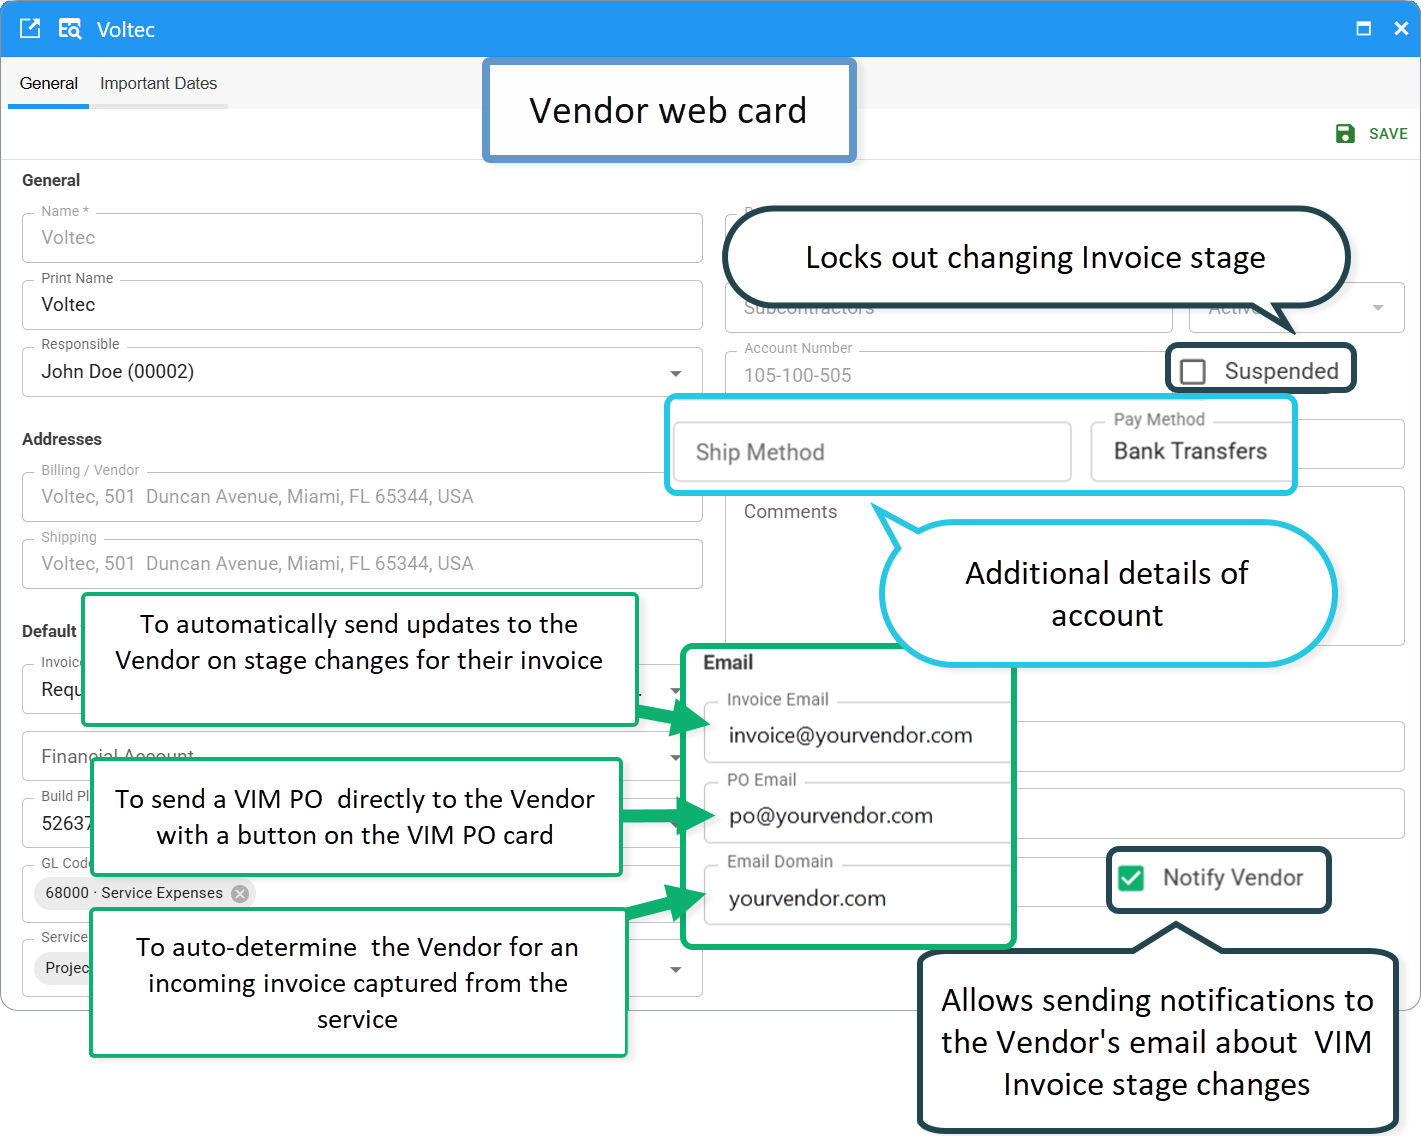
- Edit general vendor details, account settings, emails (Invoice Email, PO Email, Email Domain), suspended flag, and defaults used by VIM.
- Save the record after updating it.
If the vendor is Synced with your accounting system, fields that come from sync stay locked — change those in QuickBooks (or your accounting system), then sync again. Fieldclix-only fields (emails, Important Dates, suspension workflow, and similar) stay editable in Fieldclix.
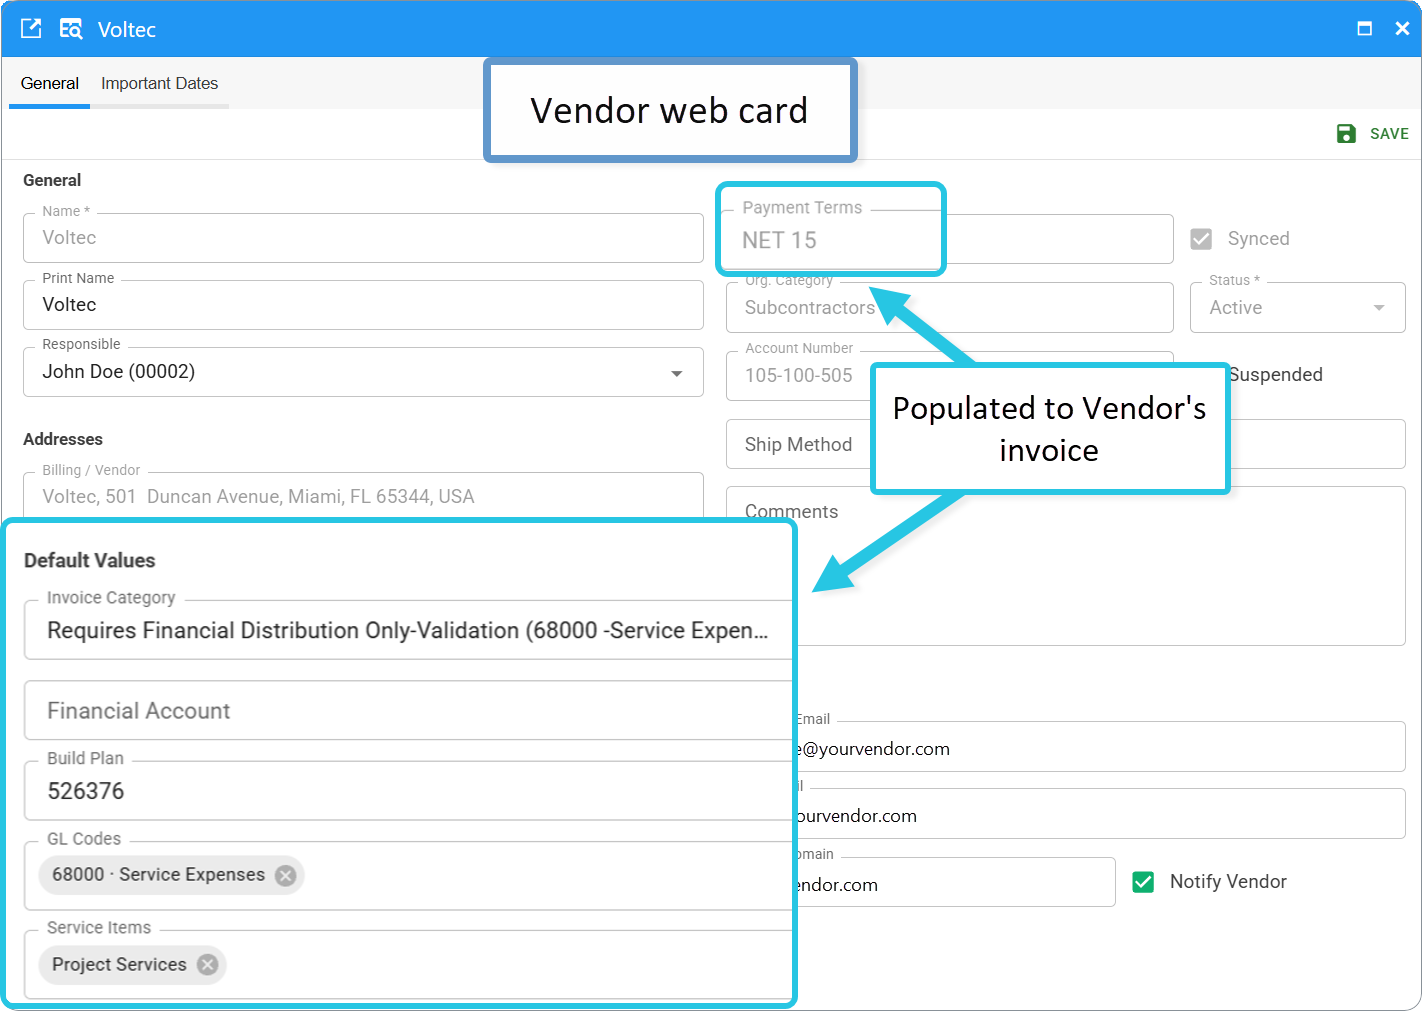
Vendor Accounting Settings
The Vendor card is where we set the vendor's default billing settings. However, several vendor settings follow a priority system and can be overridden in the invoice allocation table. To learn more about Expense Accounts, Financial Account, Build Plan priority in the invoice allocation tables read the following article.
You can put many emails in Invoice Email and PO Email fields. The delimiter is “;”.
The email domain is the web address that comes after the @ symbol in an email address. To define Vendor correctly during the invoice capture, do not enter the @ symbol in the Email Domain field.
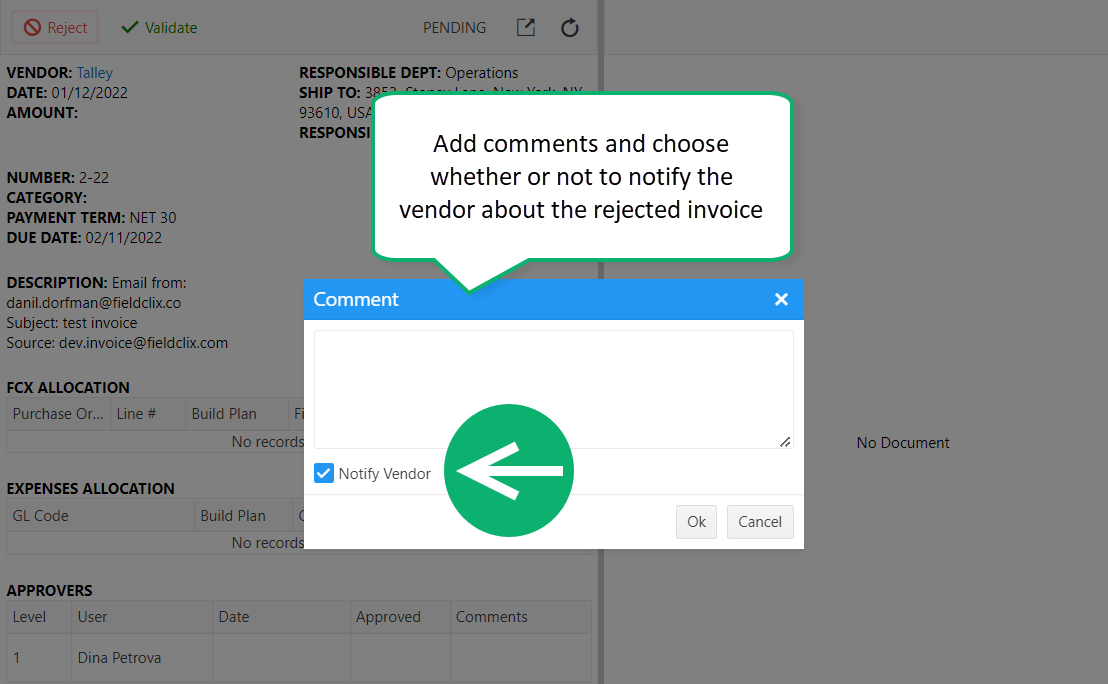
The Notify checkbox in the Vendor card allows you to enable email notifications for the Vendor about VIM Invoice stage changes. You can also choose for the particular invoice whether to notify the Vendor about a rejected Invoice or not.
If a Vendor is no longer suspended, the Vendor's Responsible will receive a notification.
Open the Important Dates area on the same card when you track expirations and suspension reminders.
Important Dates
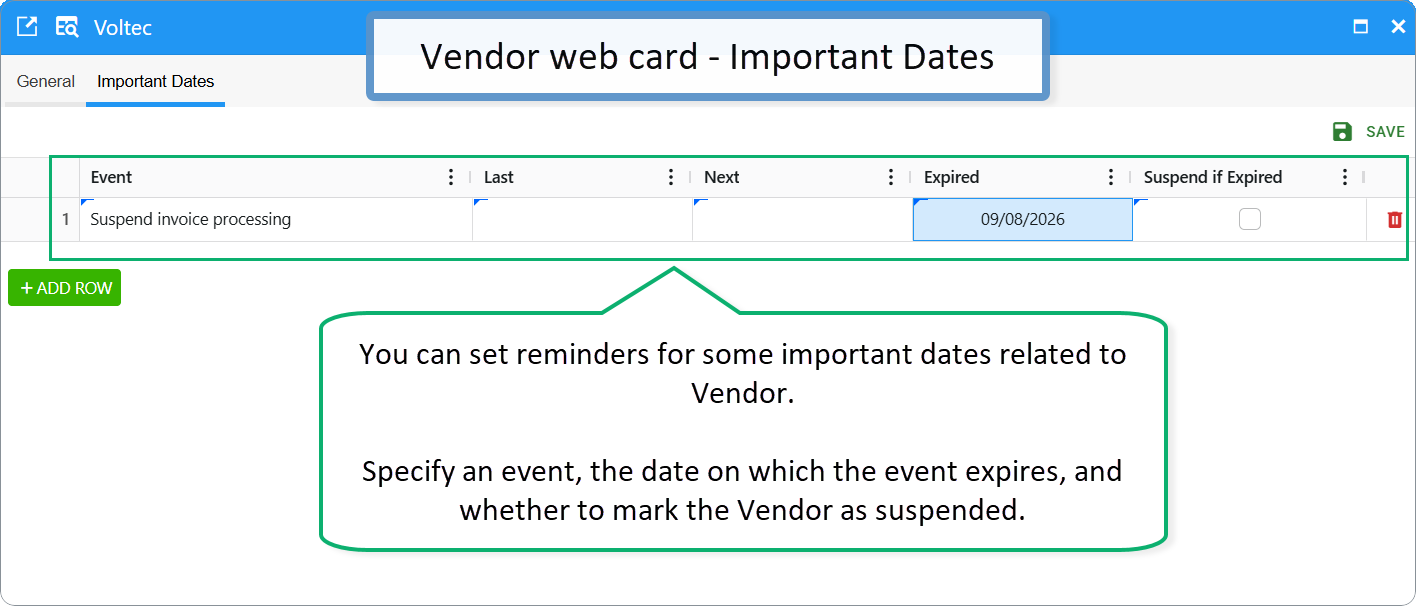
On the Important Dates tab, we can monitor events related to the Vendor.
How it works
We describe an event, set the expiration date. The expiration date indicates when event reminders will cease.
Also, we can set a “yes" value in the field “suspend if expired” if we want to put on hold the invoice process for the Vendor.
The system checks the reminder schedule and notifies the Vendor Responsible Employee about the event.
The reminder schedule can be different: once or daily. If the reminder is sent each day, the system displays the last and next date of reminder in the appropriate fields in the Vendor card.
When the event date expires, the Vendor will be suspended.
Desktop option
- Turn on Desktop Integration if you open desktop from the web portal.
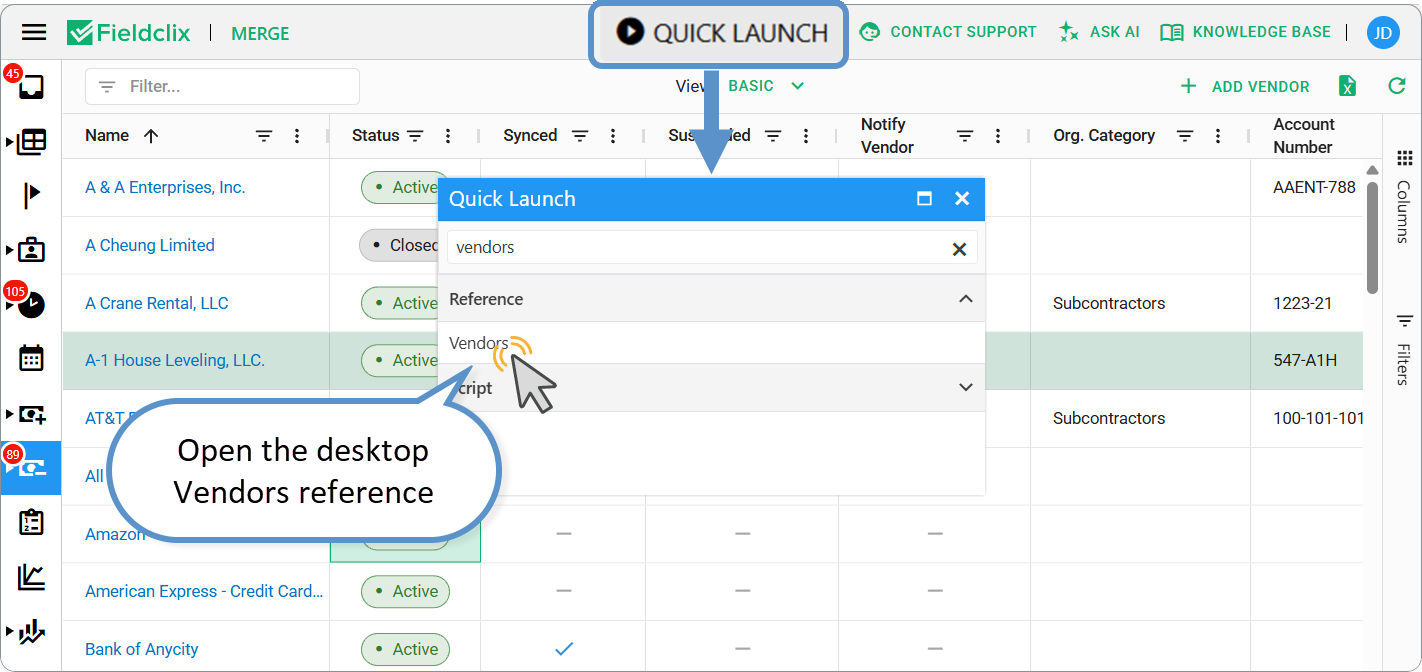
- Open Quick Launch.
- Search for Vendors and open that list.
- Create or edit records there the same way as before.
- Edit the Billing/Vendor Address and Shipping Address in the desktop vendor card if needed.
Was this article helpful?
That’s Great!
Thank you for your feedback
Sorry! We couldn't be helpful
Thank you for your feedback
Feedback sent
We appreciate your effort and will try to fix the article